How to Use Receiptify with Apple Music

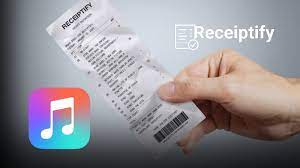
If you’re an Apple Music fan and want a fun, visual way to see and share your music listening habits, Receiptify is a great tool. Originally popular with Spotify users, Receiptify creates a receipt-style visual showing your most-listened-to songs over different time periods. This “receipt” can be shared on social media, making it a cool way to display your top tracks. Here’s a detailed guide on how to use Receiptify with Apple Music.
What is Receiptify?
Receiptify is a web-based app created by Michelle Liu, inspired by Spotify Wrapped and the desire to showcase listening data in an engaging, visual way. Receiptify pulls your top tracks data and arranges them like an itemized receipt, with song titles and artists listed alongside play counts or a similar metric. It’s a fun take on data visualization, especially if you want to keep track of your music habits or share them with friends.
Setting Up Receiptify with Apple Music
Receiptify initially supported only Spotify, but now it works with Apple Music as well. The process to set it up for Apple Music is simple but involves a few steps to ensure the app has access to your data.
Step 1: Visit Receiptify’s Website
Start by going to Receiptify’s official website. Since it’s a web-based tool, you don’t need to download any app on your phone or computer.
Step 2: Log in with Your Apple Music Account
Once on the Receiptify site, you’ll see the option to log in with Apple Music. Click on this button to be redirected to the Apple Music login page, where you’ll need to enter your Apple ID credentials. This is to grant Receiptify access to your listening data.
Note: Receiptify may request permission to view your Apple Music library and listening history. This access is essential for the app to fetch your top tracks. Your data is not stored permanently and is used only to generate the receipt.
Step 3: Choose Your Time Period
Once logged in, Receiptify will present you with three options for your top tracks:
- Last Month
- Last 6 Months
- All Time
Select the time period you’re most interested in, depending on whether you want to see recent favorites or your all-time top songs. Receiptify will pull data based on this selection and prepare a visual receipt.
Step 4: Generate Your Receipt
After selecting a time period, Receiptify will generate a receipt-style image featuring your top 10 most-played songs. Each song will display its position, artist name, and the amount of time you’ve spent listening. This process usually takes just a few seconds.
Step 5: Save and Share Your Receipt
Once your receipt is ready, you’ll see an option to download the image. Tap “Download” to save it to your device, or take a screenshot if you prefer. You can then share it on social media platforms like Instagram, Twitter, or Facebook to show off your favorite songs. It’s also great for sparking conversations with friends who have similar music tastes!
Troubleshooting Common Issues
Since Receiptify relies on third-party login and data access, some issues might come up. Here are some quick tips:
- Issue: Unable to Log in with Apple Music – Double-check that your Apple Music subscription is active. Also, ensure you’re logged into the correct Apple ID associated with your music account.
- Issue: Data Not Loading – Sometimes, if Receiptify is experiencing high traffic, it may take a while to load your data. Refresh the page or try again later if it’s slow.
- Privacy Concerns – Receiptify only uses your data to generate the receipt and does not store it long-term. However, if you have concerns, log out of Receiptify once you’re done, and revoke access from your Apple Music account settings.
Why Use Receiptify with Apple Music?
- Personalized Data Visualization: Receiptify offers a fun way to visualize your music listening habits, making your top songs feel like a personalized list that you can reflect on and enjoy.
- Social Sharing: The receipt format is an engaging way to share your top music picks on social media, allowing you to showcase your taste and discover friends with similar listening habits.
- Tracking Music Trends Over Time: By checking in periodically, you can see how your music taste evolves over the months and years, comparing your top songs for each time period.
Alternatives to Receiptify for Apple Music Users
If you enjoy Receiptify, you might also like similar music data tools that provide fun insights, such as:
- Apple Music Replay: Apple’s built-in feature offers an annual review of your listening history, much like Spotify Wrapped.
- Stats.fm: Available on the App Store, this app lets you view a more comprehensive analysis of your Apple Music stats.
- MusicScape: This tool provides a colorful visualization of your top tracks and listening history, creating a unique “musicscape” of your listening habits.
Final Thoughts
Using Receiptify with Apple Music is a fun, straightforward way to turn your listening habits into a visual keepsake. With its receipt-style design, you can showcase your favorite tracks, compare listening habits over time, and share your unique taste with friends. Plus, it adds an element of personalization that makes your music experience even more enjoyable.
FAQs About Receiptify
1. What is Receiptify?
Receiptify is a web-based app that creates a receipt-like visual of your most-listened-to songs over different time periods. Inspired by the classic look of a shopping receipt, it lists your top songs by artist and title, along with listening stats, allowing you to easily see and share your favorite music.
2. Which music platforms does Receiptify support?
Receiptify currently supports Spotify and Apple Music. It was initially designed for Spotify users, but has since added Apple Music integration due to popular demand.
3. How do I log in to Receiptify?
To use Receiptify, go to receiptify.herokuapp.com, then select your preferred music platform. You’ll need to log in to your Spotify or Apple Music account to allow Receiptify access to your listening data.
4. Is Receiptify safe to use?
Yes, Receiptify is generally safe. It only uses your data to generate the receipt-style image and does not permanently store or share your data. However, if you’re concerned about privacy, you can revoke Receiptify’s access from your Spotify or Apple Music settings after using it.
Also Read: Isotonix Lawsuit: What You Need to Know
5. What data does Receiptify access?
Receiptify only accesses your top-listened-to tracks and your listening history for specific time periods (last month, last 6 months, or all-time). It doesn’t access other personal information like playlists or private account details.
6. Can I use Receiptify on my phone?
Yes, Receiptify is accessible from any device with a web browser, including smartphones, tablets, and computers. The app’s mobile-friendly design makes it easy to use on smaller screens as well.
7. How do I save and share my Receiptify receipt?
Once your receipt is generated, you can download the image directly to your device. From there, you can share it on social media platforms like Instagram, Twitter, or Facebook, or even send it to friends via messaging apps.
8. What time periods can I choose for my top songs?
Receiptify offers three time period options for generating your receipt:
- Last Month: Your top songs over the past month
- Last 6 Months: Your top songs from the last six months
- All Time: Your top songs over your full listening history
Select the one that best reflects the timeframe you’re interested in.
9. Why isn’t my receipt generating properly?
Sometimes, Receiptify may experience high traffic or server issues, which can slow down loading times or cause errors. If your receipt isn’t generating, try refreshing the page or revisiting it later. Ensure your internet connection is stable, and that you’re logged in to the correct music account.
10. Why don’t I see all my favorite songs in the receipt?
Receiptify shows only your top 10 most-listened-to songs for the selected time period. If a favorite song doesn’t appear, it may not have made it into your top 10 for that specific timeframe.
11. Can I customize the appearance of the receipt?
Currently, Receiptify does not offer customization options for the receipt style, such as changing colors, fonts, or layout. It sticks to a classic receipt format for simplicity.
12. Does Receiptify work without an Apple Music or Spotify subscription?
Receiptify requires access to your listening history to generate the receipt, which is typically only available to subscribed users on platforms like Apple Music and Spotify. If you’re using a free version, Receiptify may not have access to sufficient data.
13. How can I revoke Receiptify’s access to my music account?
If you no longer want Receiptify to have access to your data:
- For Spotify: Go to your Spotify account settings, find “Apps,” and remove Receiptify.
- For Apple Music: Open your Apple Music account settings and revoke Receiptify’s access in the permissions section.
14. Are there any similar apps to Receiptify?
Yes, there are other apps that offer similar ways to visualize your music data:
- Apple Music Replay and Spotify Wrapped provide annual summaries of your listening habits.
- Stats.fm and Obscurify (for Spotify) provide detailed analytics and insights into your listening trends and genre preferences.
15. Is Receiptify free to use?
Yes, Receiptify is completely free to use. It is a web-based tool that doesn’t require a subscription or payment, though it might include optional donation links to support the developer.
16. Who created Receiptify?
Receiptify was developed by Michelle Liu, who designed the tool to give users a fun and visual way to see and share their favorite songs in receipt format. The app became popular quickly due to its unique and shareable design.


